Making for Learning - Electrical Connections 2
Models for Understanding Circuits and Electricity
The previous article noted that a number of making activities using circuits do not include significant ways to help students understand why they work. A cursory internet search for paper circuits (or soft circuits or squishy circuits) will results in hundreds of pictures, examples, and recipes for how to make them. And although the more thoughtful written activities recommend at least middle school as a starting point, others suggest that these materials are easy to use for younger kids. Some sites will recommend a background knowledge in electricity, currents, etc., and provide links to information that only a physics teacher could love. And other sites focus on the “WOW” factor, how much the kids will enjoy the activity and what type of cool things can be created, and how inexpensive (and easy to order online!) they are.
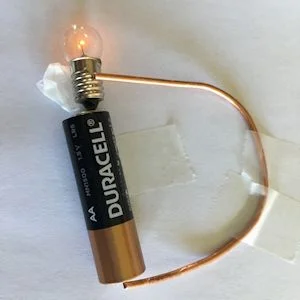
If you are just using these activities to give kids something exciting to do, you may not need to read any further. I am a firm believer in art for art’s sake. And understanding electric current is not a problem brought about by the “Maker Movement”.... in the last century, researchers noted that elementary teachers who widely used the Batteries and Bulbs unit in their science education had problems interpreting the idea of a switch. The question was asked of MIT graduates in 2007…”Can you hook up a battery and bulb with a wire to light the bulb?” The results (see YouTube) were not surprising….this could happen at any university graduation…..those students likely had memorized terms such as positive, negative, anode, cathode, conductor, resistance, but without a mental model, it was no more than a vocabulary lesson.
To STEM concepts related to electricity and circuits, we need to help students build a mental model, connected to other real-world learning, to develop a deeper understanding of what is going on. NGSS brings up the concept of electric current at grade 4. “Energy can also be transferred from place to place by electric currents, which can then be used locally to produce motion, sound, heat, or light.” There are computer models and real-life analogues to use to help with this.
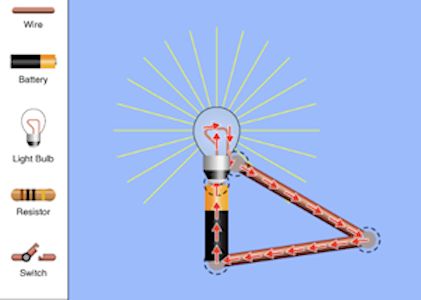
A simple simulation tool is available at PHET. A battery, wires, and a bulb can be linked, and then an animation shows the flow of current around the circuit. This has the advantage allowing students to try different connections of wires, bulbs, and batteries to see what happens.
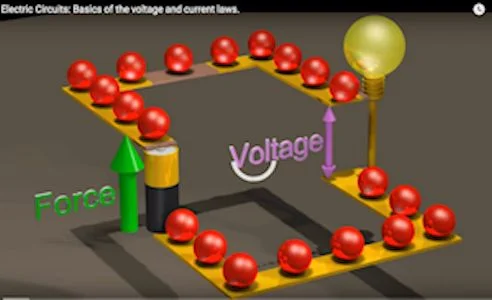
A different animation is available on YouTube.. This also shows charges moving around a circuit, with the addition of elevation. Note the force (battery) increasing the elevation (potential energy) and a voltage drop over the light bulb. The concept of potential energy does not appear in NGSS until middle school, but most students understand elevation and effort.
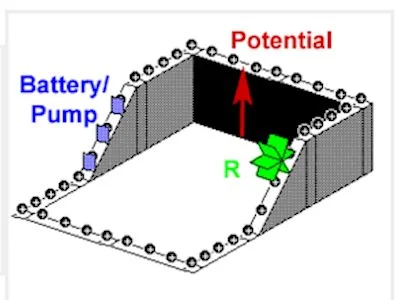
In the 90s there was a simulation using height, called CircuitVision. This showed charges moving around a circuit, and the charges were elevated by an escalator (battery), then would flow down over a waterwheel (resistor, light bulb, etc.) converting the flow to a different form of energy. After much searching the only thing similar I have found is this online animation. The advantage of this view is it connects the concept of energy increase (provided by the battery/pump, as animated by a conveyor or escalator) and energy drop (resistance R as animated by a water wheel) to two items that are likely familiar in student experience.
All three of these offer students a visual representation of what is happening in a circuit. In addition, just like making, simulations allow students to do “hands-on” and “what-if” rather than just watching or listening. The next time you do a making with circuits, use some animations or simulations to increase the effectiveness of the student learning for STEM.